From "Lost Recipes": Slumgullion, which is essentially a simple lasagna made with spaghetti and Cheddar cheese. I made this one for Greg and Olivia, and Greg's parents were here to enjoy it too. I did not. Way too much salt. The recipe has a pound of Cheddar cheese, and Cheddar is so salty on its own, if I make this again, I'll omit all the salt in the recipe and see if it makes a difference. I'm including the recipe because everyone else raved about it:
Slumgullion:
1 tablespoon olive oil, plus extra as needed
1 onion, chopped fine
1 sweet pepper, chopped
1 lb ground beef
3 garlic cloves, minced
1 tsp dried oregano
2 tablespoons all-purpose flour
1 (28-ounce) can diced tomatoes
1 cup chicken broth
(salt)
1/4 tsp pepper
1 lb spaghetti
1 lb extra old Cheddar cheese, shredded (4 cups)
1 ounce Parmesan cheese, grated (1/2 cup)
1/2 cup plain dried bread crumbs
2 tbsps unsalted butter, melted
Adjust oven rack to middle position and heat oven to 350 degrees. Grease 13 by 9-inch baking dish.
Heat oil in large saucepan over medium heat until shimmering. Add onion and pepper and cook until vegetables are softened, about 5 minutes. Stir in ground beef and cook, breaking up any large pieces with wooden spoon, until no longer pink, about 3 minutes.
Stir in garlic and oregano and cook until fragrant, about 30 seconds. Stir in flour and cook for 1 minute. Stir in tomatoes, broth, (1 tsp salt), and pepper, scraping up any browned bits. Bring to simmer and cook until mixture is thickened but still saucy, about 5 minutes. Remove from heat and cover to keep warm.
Meanwhile, bring 4 quarts water to boil in large Dutch oven. Add pasta and (1 tbsp salt) and cook, stirring often, until al dente; drain pasta. (If drained pasta sits for longer than 5 minutes, toss with 1 tablespoon olive oil.)
Spread 1 cup sauce into prepared baking dish. Spread half of cooked pasta into baking dish, then spoon 2 cups sauce over top and sprinkle with half Cheddar and half Parmesan. Repeat layering with remaining pasta, sauce, Cheddar and Parmesan. Combine bread crumbs and melted butter and sprinkle over top. Bake until filling is bubbling and topping begins to brown, 30 to 40 minutes. Let casserole cool for 10 minutes before serving.
Serves 6-8.
I like to try new recipes, constantly, and have a stack of favourites collected over the years. Everyone in the house must love the recipe or it gets tossed. I plan suppers one month in advance; supper is my favourite meal of the day! Here, I'll share with you what I made and how it turned out.
Showing posts with label ground beef. Show all posts
May 30, 2012
March 22, 2012
March 18th: cabbage rolls
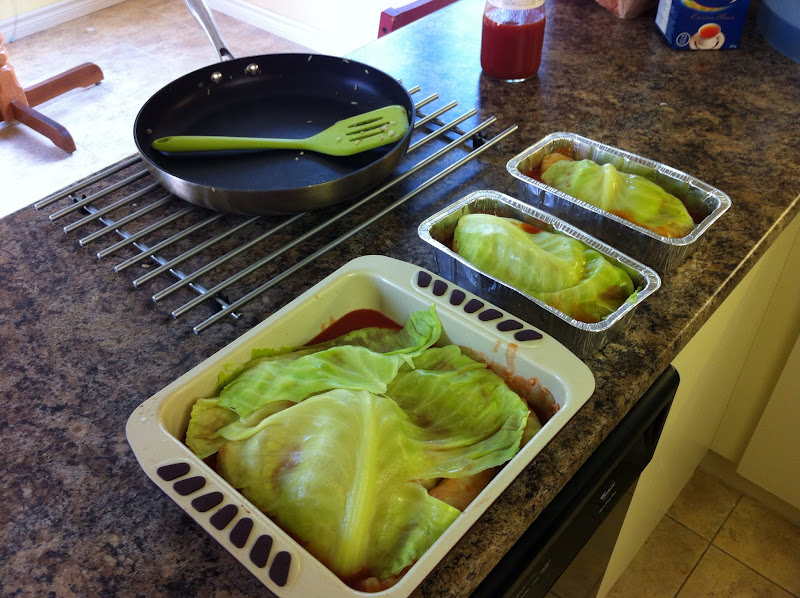
Cabbage rolls are one of my dad's specialties (though Mom would protest it is her recipe; yet when I asked her questions about it, she turned to Father for answers. Mm hm.). I prepared this as both an eat now and freeze for later meal, and it was a joint cooking venture for Greg and I, as more hands make light work with this dish. Olivia, who apparently hasn't seen Greg cook much recently, looked at him and said, "Why are you cooking?" We'll have to put him in charge of the kitchen again on occasion so she realizes both parents can do this. Apparently I've been off work too long.
In any case, the recipe as written was essentially nothing like how my father makes them, which seems to be more by taste and feeling at the time, so I've tried to approximate what I think works:
Cabbage Rolls
In any case, the recipe as written was essentially nothing like how my father makes them, which seems to be more by taste and feeling at the time, so I've tried to approximate what I think works:
Cabbage Rolls
1 head green cabbage
¾ cup rice
1 lb ground beef
vegetable oil
2 medium onions, diced
several cloves garlic, chopped
1 tsp salt, or to taste
several dashes Tabasco
2 tsp paprika
1-2 jars or cans tomato juice
Remove the first couple of dirty outer leaves from the cabbage. Whether to remove the core now or not is up for debate. We left it in. Greg, who was in charge of steaming cabbage leaves, would like to try coring in advance next time. Place whole cabbage in a large pot, add a few inches of water, cover and bring water to a boil. Monitor cabbage closely. As outer leaves soften enough to come loose, remove them one at a time to a large bowl. Leaves should be tender enough to fold, without being cooked through. Continue until all the large leaves have been harvested. There will be a small inner head of cabbage, which you can save and eat another time.
[If doubling or tripling recipe:
Meanwhile, cover rice with water and bring to a boil, cover and cook for 10 minutes. Drain.
If using single recipe, leave the rice raw.]
At the same time, heat a large skillet over medium and brown ground beef. Add a splash of oil and the diced onion. Let cook for a few minutes, then toss in chopped garlic and cook a few more minutes. When beef is cooked through, turn off heat and add rice, salt, pepper, paprika and Tabasco to taste.
When ready to assemble, pour enough tomato juice in the bottom of your pan(s) to cover, plus a bit. Working one cabbage leaf at a time, place enough filling in leaf to fill it about 1/3, so it is still easy enough to roll. Tuck in the thicker end of the cabbage leaf, roll up, and if the leaf is especially big, tuck in the ends. Place, seam side down, in baking dish. Repeat until your pan bottom is covered. Cover with more tomato juice. If your pan is deep enough for multiple layers, and you have enough leaves and filling remaining, add another layer. Repeat until you run out of filling. Cover with more juice, then cover with any remaining cabbage leaves.
Cover pan with tin foil and bake at 350°F for at least 1 hour, longer if using multiple layers of rolls, until cabbage is tender and rice is cooked through.
Makes approximately 11 cabbage rolls.
[If doubling or tripling recipe:
Meanwhile, cover rice with water and bring to a boil, cover and cook for 10 minutes. Drain.
If using single recipe, leave the rice raw.]
At the same time, heat a large skillet over medium and brown ground beef. Add a splash of oil and the diced onion. Let cook for a few minutes, then toss in chopped garlic and cook a few more minutes. When beef is cooked through, turn off heat and add rice, salt, pepper, paprika and Tabasco to taste.
When ready to assemble, pour enough tomato juice in the bottom of your pan(s) to cover, plus a bit. Working one cabbage leaf at a time, place enough filling in leaf to fill it about 1/3, so it is still easy enough to roll. Tuck in the thicker end of the cabbage leaf, roll up, and if the leaf is especially big, tuck in the ends. Place, seam side down, in baking dish. Repeat until your pan bottom is covered. Cover with more tomato juice. If your pan is deep enough for multiple layers, and you have enough leaves and filling remaining, add another layer. Repeat until you run out of filling. Cover with more juice, then cover with any remaining cabbage leaves.
Cover pan with tin foil and bake at 350°F for at least 1 hour, longer if using multiple layers of rolls, until cabbage is tender and rice is cooked through.
Makes approximately 11 cabbage rolls.
Serve topped with sour cream.
To make ahead: I can't comment on how they turned out yet, but I froze 4 cabbage rolls before baking, 2 to each small pan, with the tomoto juice under and over. Hoping they taste good when we bake them post-baby.
October 1, 2011
October 1st: chili
I planned this recipe without planning for it to be a cold, indoorsy sort of day. It just happened to work out perfectly. This chili recipe is one I've been making for years; it is simple to prepare and takes awhile to cook, so you can get the pot going then clean the kitchen (as I did) or relax (as I would have liked to do). It's also mildly spiced, so if you like your food hotter, I recommend adding some red pepper flakes or Tabasco, or spice up your own bowl. It's got loads of flavour though. The original comes from All Recipes, but I've tweaked it over the years to perfection:
Chili
Makes 4 servings.
In tonight's version, I added veggies from our farm box: 1 diced green pepper, added in step 1, and the last of the summer tomatoes, chopped and added in step 2. Delicious additions.
Topped with Cheddar cheese, diced green onion and sour cream, and served with a baguette on the side. Perfect first day of October meal.
Chili
1 pound (454 g) ground beef 1 onion, chopped 2 cloves garlic, minced 1 tablespoon chili powder 1 teaspoon salt | 1 teaspoon dried oregano 1 798 mL can diced tomatoes 1 213 mL can tomato sauce 1 398 mL can kidney beans with liquid |
DIRECTIONS:
| 1. | Combine ground beef, onion and garlic in large stockpot. Cook and stir over medium heat until beef is brown. |
| 2. | Stir in chili powder, salt, oregano, tomatoes and tomato sauce. Heat to boiling, reduce heat to simmer, and cover. Cook, stirring occasionally, for 1 hour. |
| 3. | Stir in beans. Simmer, uncovered, for 20 minutes; stir occasionally. |
Makes 4 servings.
In tonight's version, I added veggies from our farm box: 1 diced green pepper, added in step 1, and the last of the summer tomatoes, chopped and added in step 2. Delicious additions.
Topped with Cheddar cheese, diced green onion and sour cream, and served with a baguette on the side. Perfect first day of October meal.
| Camera batteries died. iphone takes terrible indoor photos. Sigh. |
May 2, 2011
May 1st: Salisbury Steak with Mushrooms
I’m going to give this one a quick mention because Greg loved it. I’m super tempted to toss the recipe, but instead I’m going to make some modifications and give it another go. From March 2011’s Chatelaine: Salisbury Steak with Mushrooms. This is essentially fancified fried hamburgers. The meat is super tender and flavourful. The modifications I am suggesting are to double up on the sauce recipe, that being the butter/mushroom/flour/beef broth combo. We loved the sauce and can never have too many mushrooms. Plus, if you are serving with egg noodles and green beans, as the recipe suggests, and as we did, the more sauce the better to pour over the noodles. This one came together fairly quickly and would be fine for a relaxed weeknight.
April 5, 2011
April 5th: (Venison) Shepherd's Pie
My father-in-law is a hunter. This is a foreign concept to me. Guns. Killing. Animals. Eek.
Okay, I know, I know, I eat meat all the time; I should be at one with the death of the animal that leads to the meat on my plate. However, I practice thought avoidance a lot when it comes to eating flesh. I can't bring myself to go see those Body World displays, not because cadavers freak me out, but because their musculature resembles steak. Ew. Humans and animals are not different enough from one another.
For months now, I've had venison--ground and steak--in my freezer, a gift from the aforesaid hunter. I haven't been sure what to do with it. Today, I finally took the plunge, and turned one package of the ground deer meat into a Shepherd's Pie.
Big sigh of relief ... it tasted okay. In truth, I don't like ground meat of any kind, and that's why Shepherd's Pie was a good choice: lots of other flavours to mask the ground meatiness. Though I was thinking as I was eating it (and loving the top cheese-potato-corn layer) (with visions of Bambi dancing through my head) that I really should figure out a vegetarian, beany bottom layer and just be done with the ground meat. But in any case: this is a good Shepherd's Pie recipe, and you could use any ol' meat you like:
Deep Dish Shepherd's Pie
Okay, I know, I know, I eat meat all the time; I should be at one with the death of the animal that leads to the meat on my plate. However, I practice thought avoidance a lot when it comes to eating flesh. I can't bring myself to go see those Body World displays, not because cadavers freak me out, but because their musculature resembles steak. Ew. Humans and animals are not different enough from one another.
For months now, I've had venison--ground and steak--in my freezer, a gift from the aforesaid hunter. I haven't been sure what to do with it. Today, I finally took the plunge, and turned one package of the ground deer meat into a Shepherd's Pie.
Big sigh of relief ... it tasted okay. In truth, I don't like ground meat of any kind, and that's why Shepherd's Pie was a good choice: lots of other flavours to mask the ground meatiness. Though I was thinking as I was eating it (and loving the top cheese-potato-corn layer) (with visions of Bambi dancing through my head) that I really should figure out a vegetarian, beany bottom layer and just be done with the ground meat. But in any case: this is a good Shepherd's Pie recipe, and you could use any ol' meat you like:
Deep Dish Shepherd's Pie
- 6 medium potatoes, scrubbed and quartered
- 1/4 cup (125 mL) milk
- 2 tbsp (30 mL) butter
- 1 lb (500 g) ground beef
- 1 small onion, chopped
- 4 garlic cloves, chopped
- 1 cup (250 mL) grated Cheddar cheese, divided
- 1 cup (250 mL) salsa
- 2 tbsp (30 mL) all-purpose flour
- 1 tsp (5 mL) Tabasco
- 1/2 tsp (2 mL) salt
- 1 398-mL (14 oz) can cream style corn
- avocado, sour cream, Cheddar cheese for serving
- Place potatoes in a medium pot and cover with water. Bring to a boil over high heat. Reduce heat to medium-low and simmer, partially covered, for 20 minutes or until tender. When potatoes have finished cooking, turn off heat, drain pot and return to hot burner. Mash with milk and butter. Set aside.
- Meanwhile, preheat oven to 375F (190C). Coat a large frying pan with oil and set over medium-high heat. Add beef, onion and garlic. Break up meat and cook until no longer pink, 5+ min. Stir in 1/2 cup (125 mL) cheese, salsa, flour, Tabasco and salt. Reduce heat to medium-low and stir often until flavours develop, 5 min.
- Turn beef mixture into a 9-in. (23-cm) deep-dish pie plate and spread evenly over bottom. Cover with cream style corn, spreading evenly. Spoon potatoes over top and spread over the entire pie plate, which will be quite full. Smooth as best you can.
- Sprinkle with remaining cheese. Bake until cheese is melted, about 5 min. Turn on broiler and leave for another 5 minutes, watching closely, until cheese starts to get bubbly.
- Serve with avocado, sour cream and more cheese to taste.
Serves 6-8.
January 16, 2011
January 16th: Yemista
Yemista: Vegetables Stuffed with Onions, Beef and Rice. This meal is much like cabbage rolls, replacing the cabbage with peppers and tomatoes. The recipe was featured in the Ottawa Citizen in September 2010, and comes from a cookbook called Three Sisters Around the Greek Table. Delicious. A bit of work in the prep and long cooking time, but yummy, filling results.
Yemista
6 tomatoes
4 peppers
1 lb ground beef
2 yellow onions, minced
1 1/2 tsps salt
1 tsp dried oregano
1/2 cup white wine
1/2 cup tomato sauce
1 cup Arborio rice
1/2 cup fresh mint, chopped
1/2 cup olive oil
freshly ground black pepper, to taste
6 potatoes, peeled, cut lengthwise into 1 in pieces
1/2 tsp salt
Slice off the tops of the tomatoes to make lids. If possible, try not to cut the lids off completely. Remove the tough inner cores of the tomatoes. Scoop the soft flesh of the tomatoes and set flesh and juice aside in a bowl.
Make lids for the peppers and seed them. Place the hollowed vegetables in a large roasting pan with a fitted lid. The pan should be large enough to hold the vegetables securely with enough room for the potatoes.
Preheat oven to 425°F.
SautƩ the ground beef in a large skillet over medium heat. Drain the fat if needed.
Add the onions, salt and oregano. Cook until the onions are soft, about 5 minutes.
Add the wine and cook until reduced by half. Add the reserved tomato flesh and juice and tomato sauce and heat through.
Add the rice and simmer for 15 minutes over low heat. Stir in the mint, half of the olive oil and some fresh cracked pepper.
Fill the tomatoes and peppers with the beef and rice mixture and place the lids on the vegetables.
Lightly salt the potatoes and place in the roasting pan around the stuffed vegetables.
Drizzle the remaining olive oil over top and place in the middle of the preheated oven, covered, for 50 minutes. Remove the lid and cook for 10 minutes further.
Remove the roasting pan from the oven and let is stand for 10 minutes before serving. Serve with feta cheese and sour cream.
Serves 6.
Yemista
6 tomatoes
4 peppers
1 lb ground beef
2 yellow onions, minced
1 1/2 tsps salt
1 tsp dried oregano
1/2 cup white wine
1/2 cup tomato sauce
1 cup Arborio rice
1/2 cup fresh mint, chopped
1/2 cup olive oil
freshly ground black pepper, to taste
6 potatoes, peeled, cut lengthwise into 1 in pieces
1/2 tsp salt
Slice off the tops of the tomatoes to make lids. If possible, try not to cut the lids off completely. Remove the tough inner cores of the tomatoes. Scoop the soft flesh of the tomatoes and set flesh and juice aside in a bowl.
Make lids for the peppers and seed them. Place the hollowed vegetables in a large roasting pan with a fitted lid. The pan should be large enough to hold the vegetables securely with enough room for the potatoes.
Preheat oven to 425°F.
SautƩ the ground beef in a large skillet over medium heat. Drain the fat if needed.
Add the onions, salt and oregano. Cook until the onions are soft, about 5 minutes.
Add the wine and cook until reduced by half. Add the reserved tomato flesh and juice and tomato sauce and heat through.
Add the rice and simmer for 15 minutes over low heat. Stir in the mint, half of the olive oil and some fresh cracked pepper.
Fill the tomatoes and peppers with the beef and rice mixture and place the lids on the vegetables.
Lightly salt the potatoes and place in the roasting pan around the stuffed vegetables.
Drizzle the remaining olive oil over top and place in the middle of the preheated oven, covered, for 50 minutes. Remove the lid and cook for 10 minutes further.
Remove the roasting pan from the oven and let is stand for 10 minutes before serving. Serve with feta cheese and sour cream.
Serves 6.
| Putting lids on veggies. |
| Adding potatoes. |
| Finished product! |
November 14, 2010
November 14th: pear & cranberry muffins, artisan bread take 2, bean-free chili
Verdict:
Keeper: muffins, artisan bread, bean-free chili
Today, I managed to avoid leaving the house even once, which makes an amazing difference in the number of hours one can devote to one's past times, in my case meaning hours in the kitchen. I likely would have spent the same number of hours in the kitchen, but been more stressed out, if I had done things that needed to be done, like gone to the grocery store and the drug store. I'll worry about those things later.
During my multitudinous hours in the kitchen, I made pear and cranberry muffins and I prepped dough for gingerbread cookies (more on those whenever I get around to baking them). This was a second go-around for the muffins, and these are really good muffins, though I would say they are closer to a cupcake in terms of the amount of sugar in them. That must be why they taste so good. I think I'll keep this recipe; I just need to see what I think after eating one tomorrow for breakfast.
The recipe came from the Ottawa Citizen, November 2009, and I believe it may be a Karen Barnaby (Fish House Restaurant, Stanley Park, Vancouver) recipe, but I can't confirm that.
Pear and Cranberry Muffins
1/2 cup (125 mL) brown sugar, firmly packed
6 tablespoons (90 mL) flour*
1/4 cup (60 mL) unsalted butter, melted
1 teaspoon (5 mL) ground cinnamon
1 1/2 cups (375 mL) brown sugar, firmly packed
2/3 cup (160 mL) vegetable oil
1 large egg
1 teaspoon (5 mL) pure vanilla extract
1/2 cup (125 mL) water
2 teaspoons (10 mL) apple cider vinegar
2 1/4 cups (560 mL) flour*
1 teaspoon (5 mL) baking soda
1/2 teaspoon (2 mL) salt
2 cups (500 mL) cored ripe pear (about 1 1/2 pears), diced into 1/2-inch (1-cm) chunks
1/2 cup (125 mL) dried cranberries (or raisins, if preferred)
*I used a combination of all-purpose white and whole wheat flours
Preheat the oven to 325°F (165°C).
Prepare a 15-cup muffin tin.
To make the topping, combine the 1/2 cup (125 mL) brown sugar, 6 tablespoons (90 mL) flour, butter and cinnamon in a bowl. Mix until crumbly.
Beat the 1 1/2 cups (375 mL) brown sugar, oil, egg and vanilla together in a large bowl.
Combine the water and vinegar.
Sift the flour, soda and salt together and blend into the oil mixture alternately with the water.
Add the pears and cranberries and mix until just combined. Spoon into the prepared muffin pan and sprinkle generously with the topping.
Bake for 30-40 minutes, until golden brown and the top springs back when lightly touched.
Makes 15 muffins (or 12 muffins and 12 mini muffins) (mini muffins take 20 minutes to bake)
For supper, I whipped up artisan bread for the second time, with a few modifications. I wasn't planning to make the bread, but Patricia called me Saturday night as she was in the process of making the bread and I was inspired to make it as well. This time, though, I followed the recipe from Cook's Illustrated, which took the original Sullivan Street Bakery bread, reduced the liquid, and added in a bit of kneading to the process. Rather than using all water as the liquid, this one is a combination of water, beer and vinegar. The loaf turned out better than my first try, probably at least in part because I saved a few pieces of Saran from some mushrooms I bought and used those as plastic wrap over my bowl as I let the dough rise over night. I think I'll stick with this recipe in future; this loaf was more attractive, cooked perfectly, and tasted amazing.
To accompany the bread for supper I made a bean-free chili. This was a re-try from November 2009's Chatelaine: South-of-the-border sauce. The recipe I am keeping; the name I am not. This is a cross between a pasta sauce and a chili, without the pasta or the beans, the two parts I like the least. It's like it was meant to be. The recipe suggests serving the sauce on bread, which is what we did last year, and we didn't like that, so today we just ate it in bowls, Ć la chili, with bread on the side. This was the ideal way to eat it. Suggested toppings are sour cream and cheddar cheese (good) and avocado, which would probably be fabulous, but mine didn't ripen enough from the time I bought it on Friday. That's what happens when I plan meals last minute, as I did with this one. Had I known in advance I would need an avocado, I would have bought it a week ago.
Greg is in love with the bread, and me because of it. He swore tonight was the best meal we've ever had ever.
I'm off to Montreal for the next few days for work, so there will be no blogging for a bit. :)
Keeper: muffins, artisan bread, bean-free chili
Today, I managed to avoid leaving the house even once, which makes an amazing difference in the number of hours one can devote to one's past times, in my case meaning hours in the kitchen. I likely would have spent the same number of hours in the kitchen, but been more stressed out, if I had done things that needed to be done, like gone to the grocery store and the drug store. I'll worry about those things later.
During my multitudinous hours in the kitchen, I made pear and cranberry muffins and I prepped dough for gingerbread cookies (more on those whenever I get around to baking them). This was a second go-around for the muffins, and these are really good muffins, though I would say they are closer to a cupcake in terms of the amount of sugar in them. That must be why they taste so good. I think I'll keep this recipe; I just need to see what I think after eating one tomorrow for breakfast.
The recipe came from the Ottawa Citizen, November 2009, and I believe it may be a Karen Barnaby (Fish House Restaurant, Stanley Park, Vancouver) recipe, but I can't confirm that.
Pear and Cranberry Muffins
1/2 cup (125 mL) brown sugar, firmly packed
6 tablespoons (90 mL) flour*
1/4 cup (60 mL) unsalted butter, melted
1 teaspoon (5 mL) ground cinnamon
1 1/2 cups (375 mL) brown sugar, firmly packed
2/3 cup (160 mL) vegetable oil
1 large egg
1 teaspoon (5 mL) pure vanilla extract
1/2 cup (125 mL) water
2 teaspoons (10 mL) apple cider vinegar
2 1/4 cups (560 mL) flour*
1 teaspoon (5 mL) baking soda
1/2 teaspoon (2 mL) salt
2 cups (500 mL) cored ripe pear (about 1 1/2 pears), diced into 1/2-inch (1-cm) chunks
1/2 cup (125 mL) dried cranberries (or raisins, if preferred)
*I used a combination of all-purpose white and whole wheat flours
Preheat the oven to 325°F (165°C).
Prepare a 15-cup muffin tin.
To make the topping, combine the 1/2 cup (125 mL) brown sugar, 6 tablespoons (90 mL) flour, butter and cinnamon in a bowl. Mix until crumbly.
Beat the 1 1/2 cups (375 mL) brown sugar, oil, egg and vanilla together in a large bowl.
Combine the water and vinegar.
Sift the flour, soda and salt together and blend into the oil mixture alternately with the water.
Add the pears and cranberries and mix until just combined. Spoon into the prepared muffin pan and sprinkle generously with the topping.
Bake for 30-40 minutes, until golden brown and the top springs back when lightly touched.
Makes 15 muffins (or 12 muffins and 12 mini muffins) (mini muffins take 20 minutes to bake)
For supper, I whipped up artisan bread for the second time, with a few modifications. I wasn't planning to make the bread, but Patricia called me Saturday night as she was in the process of making the bread and I was inspired to make it as well. This time, though, I followed the recipe from Cook's Illustrated, which took the original Sullivan Street Bakery bread, reduced the liquid, and added in a bit of kneading to the process. Rather than using all water as the liquid, this one is a combination of water, beer and vinegar. The loaf turned out better than my first try, probably at least in part because I saved a few pieces of Saran from some mushrooms I bought and used those as plastic wrap over my bowl as I let the dough rise over night. I think I'll stick with this recipe in future; this loaf was more attractive, cooked perfectly, and tasted amazing.
To accompany the bread for supper I made a bean-free chili. This was a re-try from November 2009's Chatelaine: South-of-the-border sauce. The recipe I am keeping; the name I am not. This is a cross between a pasta sauce and a chili, without the pasta or the beans, the two parts I like the least. It's like it was meant to be. The recipe suggests serving the sauce on bread, which is what we did last year, and we didn't like that, so today we just ate it in bowls, Ć la chili, with bread on the side. This was the ideal way to eat it. Suggested toppings are sour cream and cheddar cheese (good) and avocado, which would probably be fabulous, but mine didn't ripen enough from the time I bought it on Friday. That's what happens when I plan meals last minute, as I did with this one. Had I known in advance I would need an avocado, I would have bought it a week ago.
Greg is in love with the bread, and me because of it. He swore tonight was the best meal we've ever had ever.
I'm off to Montreal for the next few days for work, so there will be no blogging for a bit. :)
Subscribe to:
Posts (Atom)